
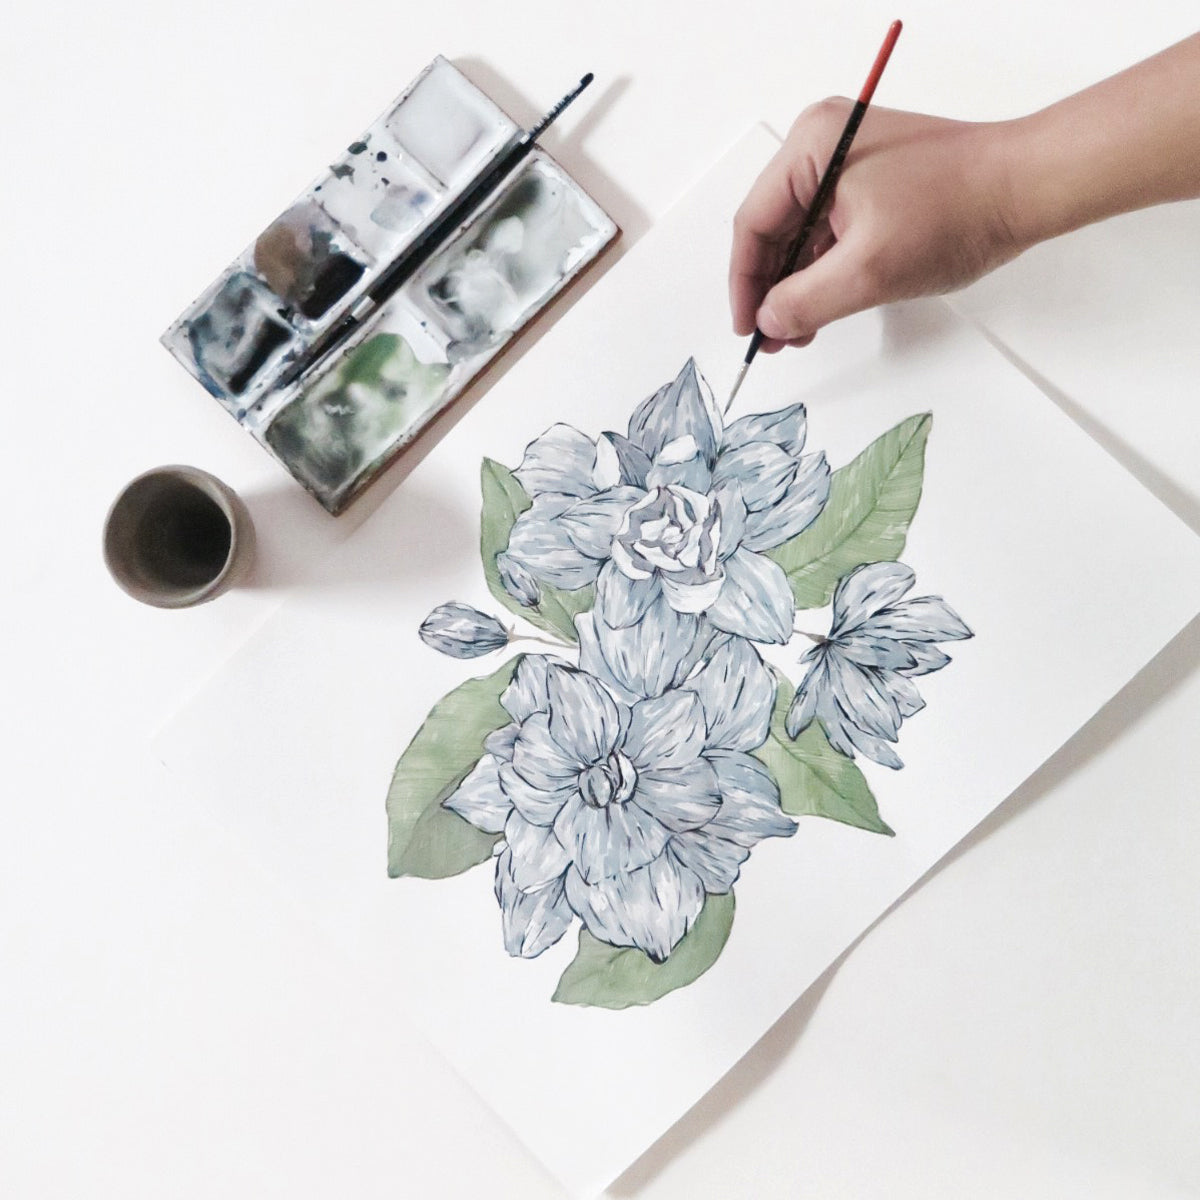
Watercolor Process: Glazing
The glazing technique in watercolor is layering wet washes over dry ones. I'm still horribly suffering from jetlag, and just made most of the time by testing out my new handmade watercolors. Here's a step-by-step look into my watercolor process.
 I start off with a light sketch. This is a rosal flower, but I decided to paint it in indigo.
Paper: 300gsm hotpressed Arches watercolor paper, 9x12 inches
I start off with a light sketch. This is a rosal flower, but I decided to paint it in indigo.
Paper: 300gsm hotpressed Arches watercolor paper, 9x12 inches
 My first watercolor layer is a light gray wash, a mixture of indigo & vermillion, mixed with lots of water.
 I used sap green, also in a watery mixture for the leaves.
Brush: #6 Black Velvet
I used sap green, also in a watery mixture for the leaves.
Brush: #6 Black Velvet
 It's important to let the layers dry before proceeding with the next step. If not, the colors just turn out muddy.
I added two layers of a watery mixture of indigo on top, using light strokes.
Brush: #2 Black Velvet
It's important to let the layers dry before proceeding with the next step. If not, the colors just turn out muddy.
I added two layers of a watery mixture of indigo on top, using light strokes.
Brush: #2 Black Velvet
 Up until this point, the painting looks messy. It's only in the last step, when I add the details, that it takes shape.
Using indigo mixed with lamp black, I paint the last layer of details (tracing the original pencil strokes) using short, broken strokes.
Brush: #0/5 Raphael
Up until this point, the painting looks messy. It's only in the last step, when I add the details, that it takes shape.
Using indigo mixed with lamp black, I paint the last layer of details (tracing the original pencil strokes) using short, broken strokes.
Brush: #0/5 Raphael

I start off with a light sketch. This is a rosal flower, but I decided to paint it in indigo.
Paper: 300gsm hotpressed Arches watercolor paper, 9x12 inches
My first watercolor layer is a light gray wash, a mixture of indigo & vermillion, mixed with lots of water.
I used sap green, also in a watery mixture for the leaves.
Brush: #6 Black Velvet
It's important to let the layers dry before proceeding with the next step. If not, the colors just turn out muddy.
I added two layers of a watery mixture of indigo on top, using light strokes.
Brush: #2 Black Velvet
Up until this point, the painting looks messy. It's only in the last step, when I add the details, that it takes shape.
Using indigo mixed with lamp black, I paint the last layer of details (tracing the original pencil strokes) using short, broken strokes.
Brush: #0/5 Raphael

Leave a comment
This site is protected by hCaptcha and the hCaptcha Privacy Policy and Terms of Service apply.